Recover deleted photos from memory card
Did you accidentally delete some valuable photos you had saved on your Memory Card? Or maybe you formatted your Memory Card and are looking for a way to get some of your old Photos Back? Well recovering photos deleted from your Memory Card or any other type of SD card has never been easier and can be done; with the right tools you can have your deleted photos back in no time, provided you have met a few essential conditions. So for anyone out there who is looking for an answer to the question, "How to Recover Deleted photos from Memory Cards", here is how you would go about retrieval of your photos...
OK, let's begin. To maximise your chances of being able to recover deleted photos successfully, just follow this simple procedure:
Step 1. To recover the deleted photos, you need to connect your camera to your Mac (usually via USB). You may also need a card reader for your media if your camera is not supported as a removable disk device. When you insert the card in the card reader, and connect the card reader to your computer, it will appear as a drive letter, which will allow software to access the Photos on the memory card.
Step 2. If you have got your camera or card reader connected, you may download the
AppleXsoft Mac Photo Recovery. and then install it on your computer.
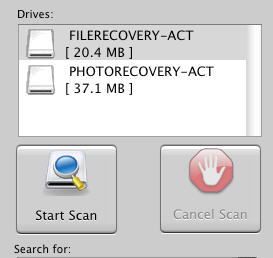
Step 3. Then run AppleXsoft Photo Recovery for Mac and specify the drive letter of your camera or card reader.
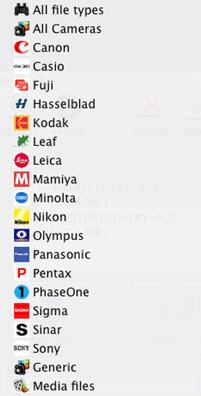
Step 4. Choose the type of image file you are looking for, or select the model camera you are using.
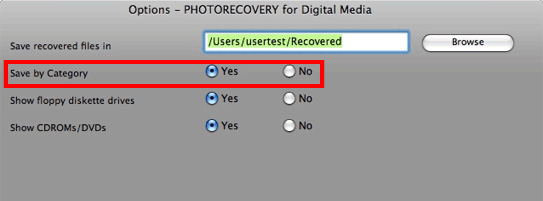
Step 5. Click the Options button and select the destination to save the recovered Photos.
Do not select your media card as the destination, as this will destroy the data on the card and it will not be recoverable! Choose a separate drive and folder. The default is the user's home folder.
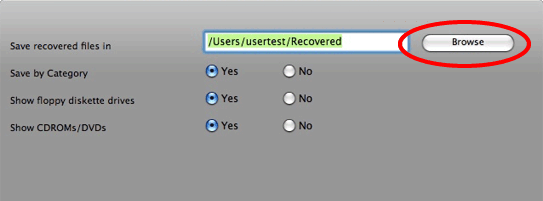
You can also choose to save the files by category in the Options screen. This will save the files in subfolder categories in your destination folder.
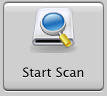
Step 5. Click the "Start Scan" button, You should now be able to view your deleted Photos in the photo recovery preview window! Your files will automatically be saved in the destination folder.
When the scan is finished, you will get a scan completed message.
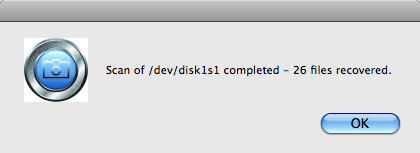
Browse to the folder that you selected for your recovered photos and check out the results of the recovery.
Glossary:
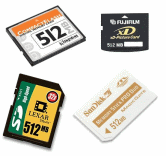
A memory card (sometimes called a flash memory card or a storage card) is a solid-state electronic flash memory data storage device capable of storing digital contents. The primary use is with digital cameras, mobile phones, laptop computers, and video game consoles.
Important:
- Never choose the volume you are scanning as the destination drive! This will erase all recoverable data!
- You should not use the system with the deleted files to surf the Interne, check mail or create documents.
- The more activity, the less of a chance for a successful recovery.
Related Questions

