The ultimate quick and easy to use Canon Image recovery solution.
Recover Canon RAW Image
Canon is one of the most popular digital cameras manufacturers around the world for its great user experience and high-quality pictures.
Earlier Canon digital cameras like EOS D60, EOS D30, EOS 10D all use .CRW as the raw image format. CR2 is a RAW format developed to replace .CRW format and has been used by some popular Canon digital cameras, such as EOS300d, EOS350d, and EOS400d. Well, many photographers like to choose the RAW format .CRW or .CR2 as the format of the output pictures so as to get the high definition digital photos.
Basically, nothing is perfect. Every photographer especially people who don’t know how to properly operate the digital camera will encounter a tricky problem ”lost data” in their photography career even though he or she gets the best application in hand. There are many elements that would probably leads to data loss, data damage:
- Mistakenly format the memory card
- Accidently delete files
- Take out the memory card while any processing is going on
- File RAW formats damage
However, user don’t need to worry about this for all those lost or damaged CRW or CR2 image files are recoverable by using some reliable third party recovery tool. AppleXsoft Photo Recovery for Digital Media is such a RAW Photo recovery software designed to recovers images, documents, video, audio from digital cameras, memory card and mp3 player. Here are detailed steps:
Step 1. Connect your camera to your Mac usb port with a wire. You may also need a card reader for if your camera is not supported as a removable disk device.
Step 2. Download and start
AppleXsoft Photo Recovery for Mac on your Mac computers. For Windows users, please download the
Photo Recovery for Windows. In the Drive column, select your camera or reader by the drive letter
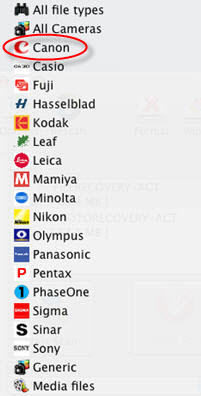
Step 3. Select cannon from the search for drop down menu. To narrow the scanning, here we check CRW or CR2 from the File types list since we try to recover the RAW images from Canon camera in this test
Step 4. Now click the Options button on the menu bar. The Options dialog opens. Select a folder to save the recovered photos. Don’t set your camera memory card which you want to recover files from as the destination, as this may destroy the data on the card.If you select the Save by category option, it will save the files in subfolder categories in your destination folder. Click OK button to apply the settings.
Step 5. Click the Start scan button. The program begins to scan the lost data on your camera or memory card. A reminding message will pops up after the scanning. Then follow the save directory, and you will find the lost raw images are back.
 You may find AppleXsoft Photo Recovery useful if…:
- your Canon camera is formatted, and want to recover RAW images form formatted memory card.
- you deleted one or more RAW Image CRW, CR2 files from your Canon camera by accident, and want them restored.
- you deleted some Photos or Video from your memory card, and want to recover them.
- you came across an old memory card of yours (or someone else’s) that’s been corrupted or formatted, and would like to see what its previous contents were.
Related Questions

