AppleXsoft File Recovery for Mac was designed to be easy for using and friendly to users. The recovery wizard allows even novice users to successfully recover lost data on Mac OS X..
The following guide will show you it's true. Let's get started!
First, Download
AppleXsoft File Recovery for Mac. The file you are downloading is named "FileRecoveryforMac.dmg". and then install it on your computer.
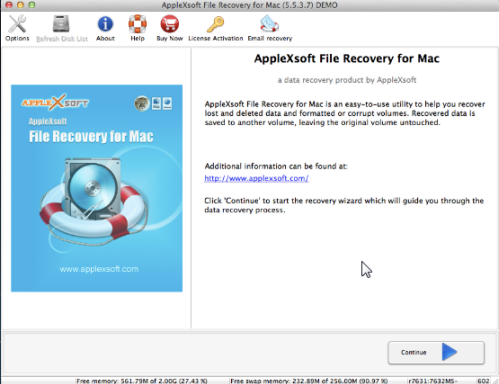
Start AppleXsoft File Recovery for Mac and click Continue. and the interface will help you choose each step in the recovery process.
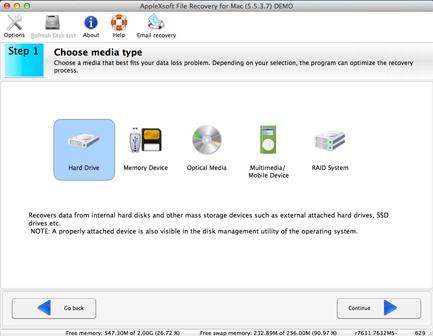
1. Choose a media that best fits your data loss problem.
Depending on your choice, the program will optimize the recovery process.
To recover lost data in your computer, just choose Hard Drive. Then go to next step.
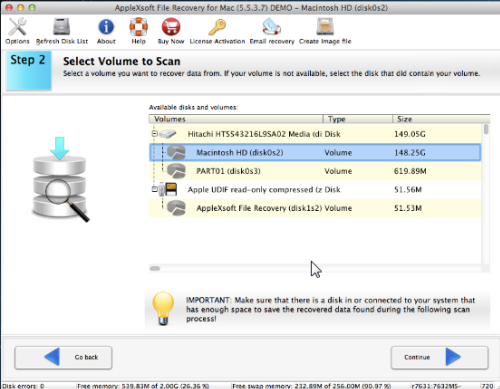
2. Select a partition you want to recover data from. If your volume is not available,
select the disk that did contain your partition. Then the program will automatically
scan the selected partition or disk to find the lost files.
3. Choose a recovery mode based on your data loss scenario. Please note that there are
several options that you can choose. Each is listed below. You will only choose one of the options.
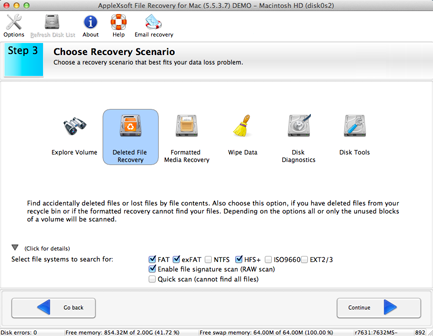
At the bottom of the screen is a details option where you can limit the scan to certain file systems or
a RAW file scan. RAW file scans examine the drive and tries to locate files by file content and architecture.
In cases where there are no other options for file system scanning, this can still recover usable data.
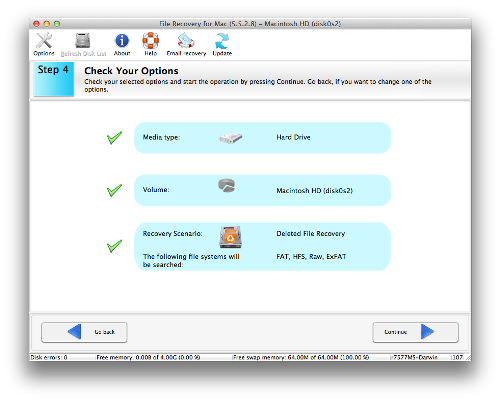
4. Check your selected options. If you want to change one of the options, please go back.
If you are satisfied with your options that you have chosen, click Continue to begin the scan for
your lost data.
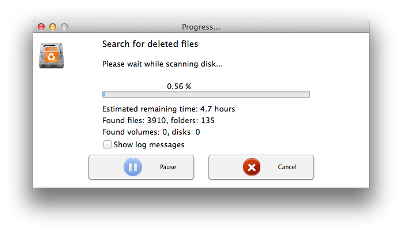
The process of scan may take long time. It depends on the size of your disk,
please be patient. You can also choose to view the log messages in the scanning window
if you need to do any troubleshooting of the scan.
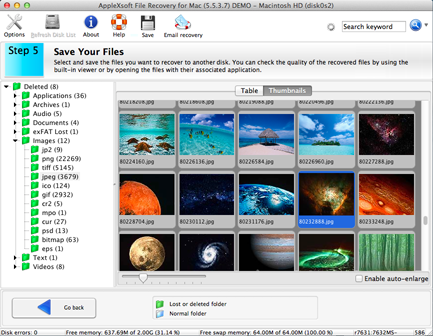
5. When the scan is completed, the recoverable files will be shown in the list.
You can check the quality of the recovered files by using the built-in viewer or
by opening the files with their associated applications. Select and save the files you want to
recover to another disk.
A typical save dialog will be displayed, and you will be able to save your files into existing folders
or create new ones.
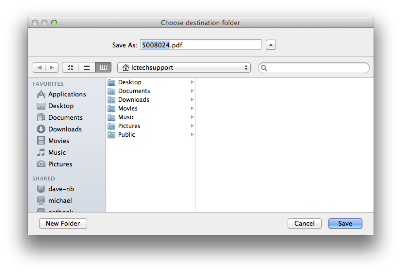
NOTE: Do not save data back to the same disk you are scanning. Always save the data to another location!
That is all there is to recovering your lost data or deleted data on Mac OS X!
Important:
- Never choose the volume you are scanning as the destination drive! This will erase all recoverable data!
- You should not use the system with the deleted files to surf the Interne, check mail or create documents.
- Never install software to a disk containing deleted files you wish to recover.
- The more activity, the less of a chance for a successful recovery.